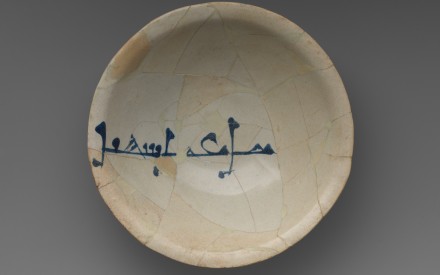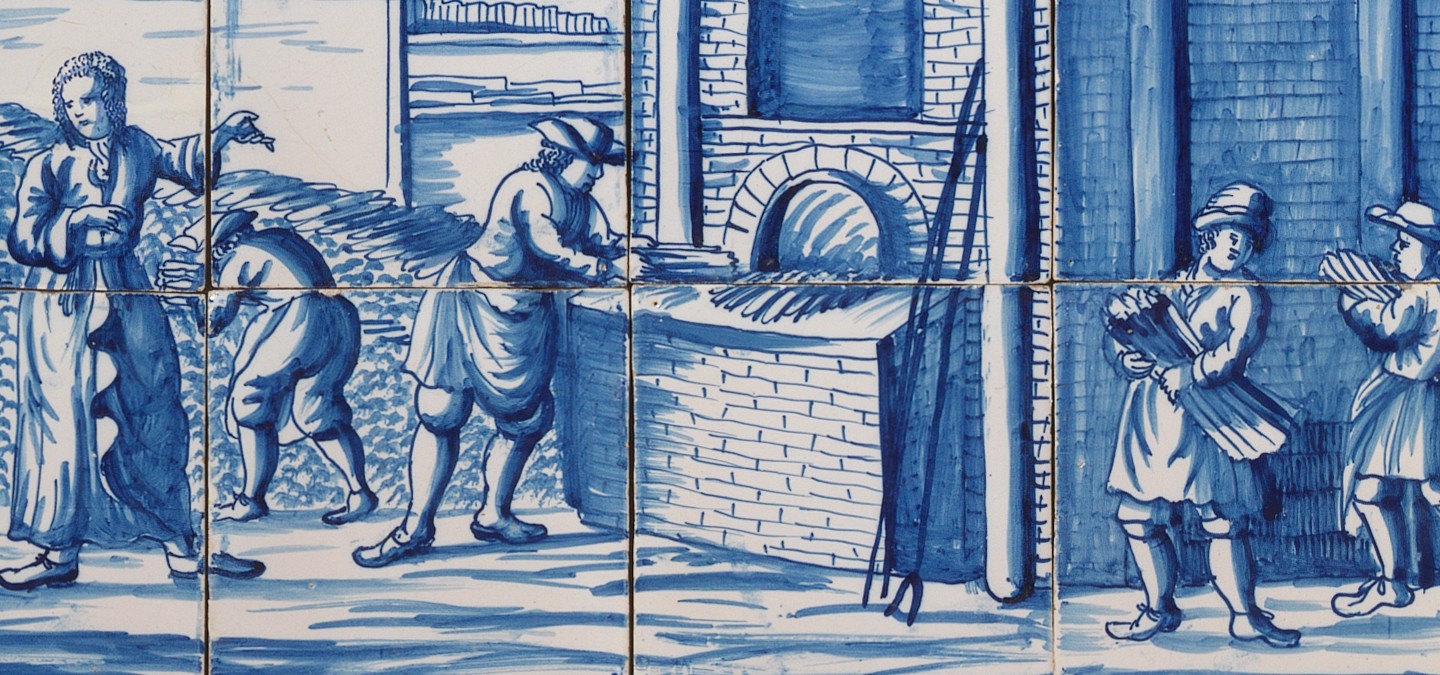
At the height of production in the late 17th century there were no fewer than 33 potteries in Delft. Firing earthenware is a complex process that requires a lot of space. The process could take as long as two weeks, from preparing the clay to cooling the finished product and preparing it for sale.
A pottery would therefore usually be a large complex with one or more kilns for firing the pots. Other facilities were also needed on site: drying lofts (droogzolders), woodsheds, warehouses and a salesroom. Proprietors would often have their home on the complex, too.
Everyone at the pottery had their own specialisation and was responsible for a particular part of the production process.
The most elaborate description of the production of Delftware was captured at the end of the eighteenth century by the patriotic writer Gerrit Paape, who had worked in a pottery as a child. The illustrations on this page are all part of his book 'De plateelbakker of Delftsch aardewerkmaaker' ('The potter or Delftware maker', 1794).
Mixing the clay
The clay for Dutch delftware consisted of several kinds: local clay, fattier clay from Germany and dry marl from the Tournai region of Flanders or England. This combination allowed thin earthenware objects to be made. The clays were mixed and purified in a clay washery – an independent enterprise that would supply several potteries.
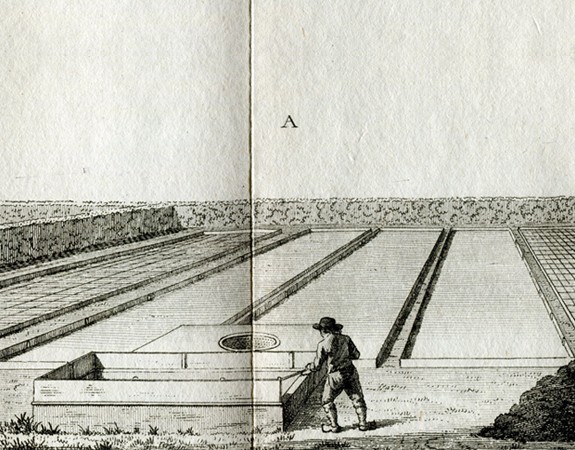
The pottery would store square blocks of clay in pits
The washery would add water to the clay to mix the different types. The thin suspension would then be passed through a copper sieve and caught in trays where it dried and stiffened. Once the clay was dry it would be cut into square blocks and taken to the pottery, where it would be stored in pits.
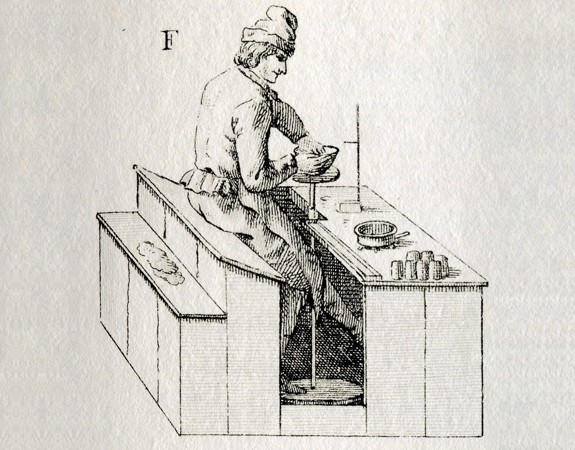
Earth treader
At the pottery the clay had to be made soft and pliable again, of course. This was the job of the aardetrapper (literally, ‘earth treader’), who would knead the clay with his bare feet.
Throwing and shaping
The softened clay would go to the throwers (draaiers) and shapers (vormers), who would turn it into objects. Throwers used the potter’s wheel to produce dishes and other circular items. Other shapes, and items that consisted of several parts, such as vases and animal figurines, would be made by the shapers. They used plaster moulds to repeat a shape. Components like knobs and handles would be shaped by hand and stuck on using clay slurry (kles).
Separate components would be stuck onto the object using clay slurry
At this point the pieces still contained a lot of water, so they had to be dried in the drying loft, otherwise the clay would fracture in the kiln. Once it was dry the shaper could make any necessary adjustments.
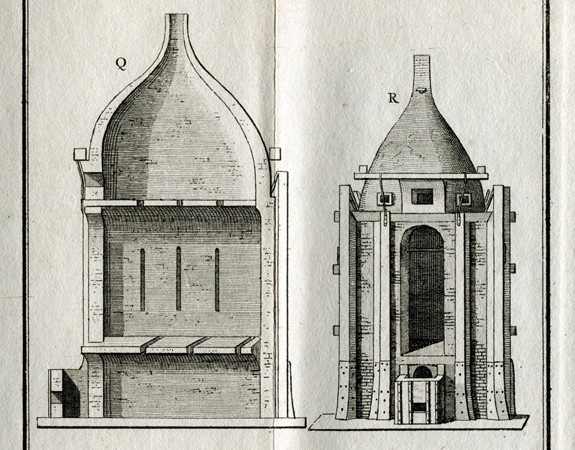
Initial firing
Before being glazed, the pots were given an initial firing . Stokers would heat the kiln to 800-1000° C. The wares became hard and buff-coloured during firing. They were now known as 'ruw gebakken goed’ (literally, ‘rough fired wares’). These days the term 'biscuit ' is also used in both Dutch and English.
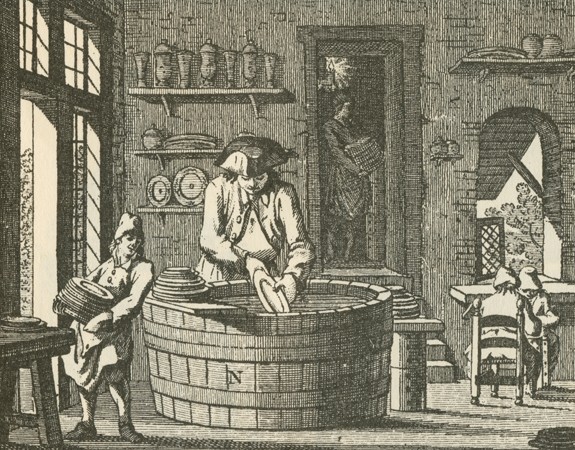
Glazes
Gevers (literally, ‘givers’) would scrub the rough fired wares clean and dip them in a bath of tin glaze . This mix of lead, tin, sand, soda and salt would first be fired in the kiln to make a vitreous plate, then ground in a paint mill.
If the pots were to be plain white, they were now ready for the second firing. Or they could be painted, by the plateelschilder .
Painter
The plateelschilder painted by hand, or use a pounce (spons – a piece of paper with perforations) to apply dotted lines of charcoal to the object, which he could then paint over. This was a good way of transferring the same patterns and pictures to several objects.
The grey pigment turned bright blue in the kiln
The famous blue pigment is a cobalt oxide mined in Germany. When painted on it would be dark grey, but this would change to bright blue in the kiln. The purer the cobalt, the brighter the blue. To give objects extra gloss, they could then be covered with a layer of transparant lead glaze , in a process known as kwaarten .
Second firing
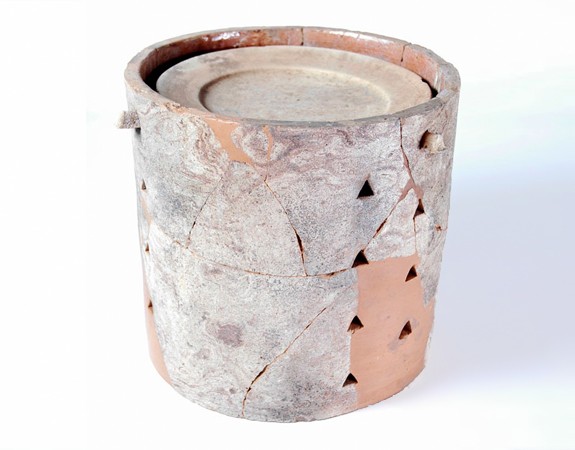
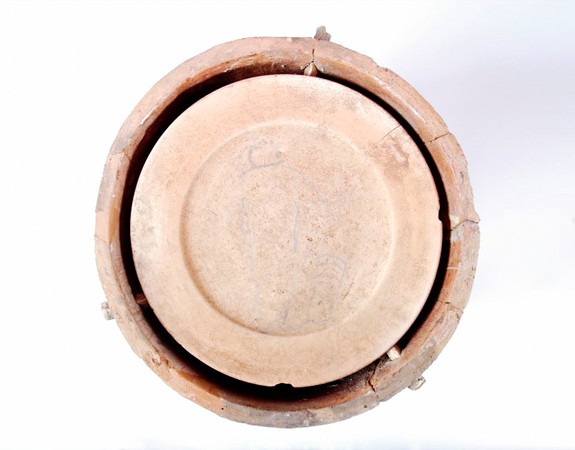
Now all the objects could be returned to the kiln for the second ‘glaze’ or ‘glost’ firing . They would be placed in earthenware saggars to ensure that they were not damaged by flames or fumes. Inside the saggars the pots were separated by pegs, to stop them from fusing together. After this firing, they pots would be smooth.
It would take several days for the pots to be fired and cooled. If the kiln was too hot the earthenware could become misshapen. If it cooled too fast cracks could appear. The pieces were therefore inspected and sorted into top quality (‘schoongoed’) and seconds ('entredeux’ or ‘wrak'). All manner of things could go wrong during the firing process. There is even a story of a batch of Delft blue that came out green!
Third firing
Many colours could be applied before the second firing, which used the grand feu technique. But the temperature was so high that gold, red and black would burn away. They were therefore applied after the second firing. The pots would then go into the kiln for a third time, at 600 degrees Celsius – the petit feu technique. This part of the process was sometimes carried out by homeworkers using small muffle kilns .